
DIY Holiday Planters
One of my favorite things about staying home for Thanksgiving is that we have an extra couple of days to prepare for Christmas. My eldest has a December birthday so I need all of the extra time I can get to prepare for the month of December. One of the first things I like to tackle each year is our planters!
We have one of the most wonderful Garden Centers close to our home called Gesthemane Garden Center. It is a glorious place and they have beautiful pre planted planters for purchase but a few years ago I wanted to see if I could accomplish a similar look on my own. I use a combination of real and fake elements and I think I've come up with a great option. In order to keep the cost down I reuse some components year after year i.e. birch logs, pinecones and faux berries and then buy a selection of fresh greens from Trader Joe's and Gesthemane Garden Center. Read on for my TAKE on a holiday planter!
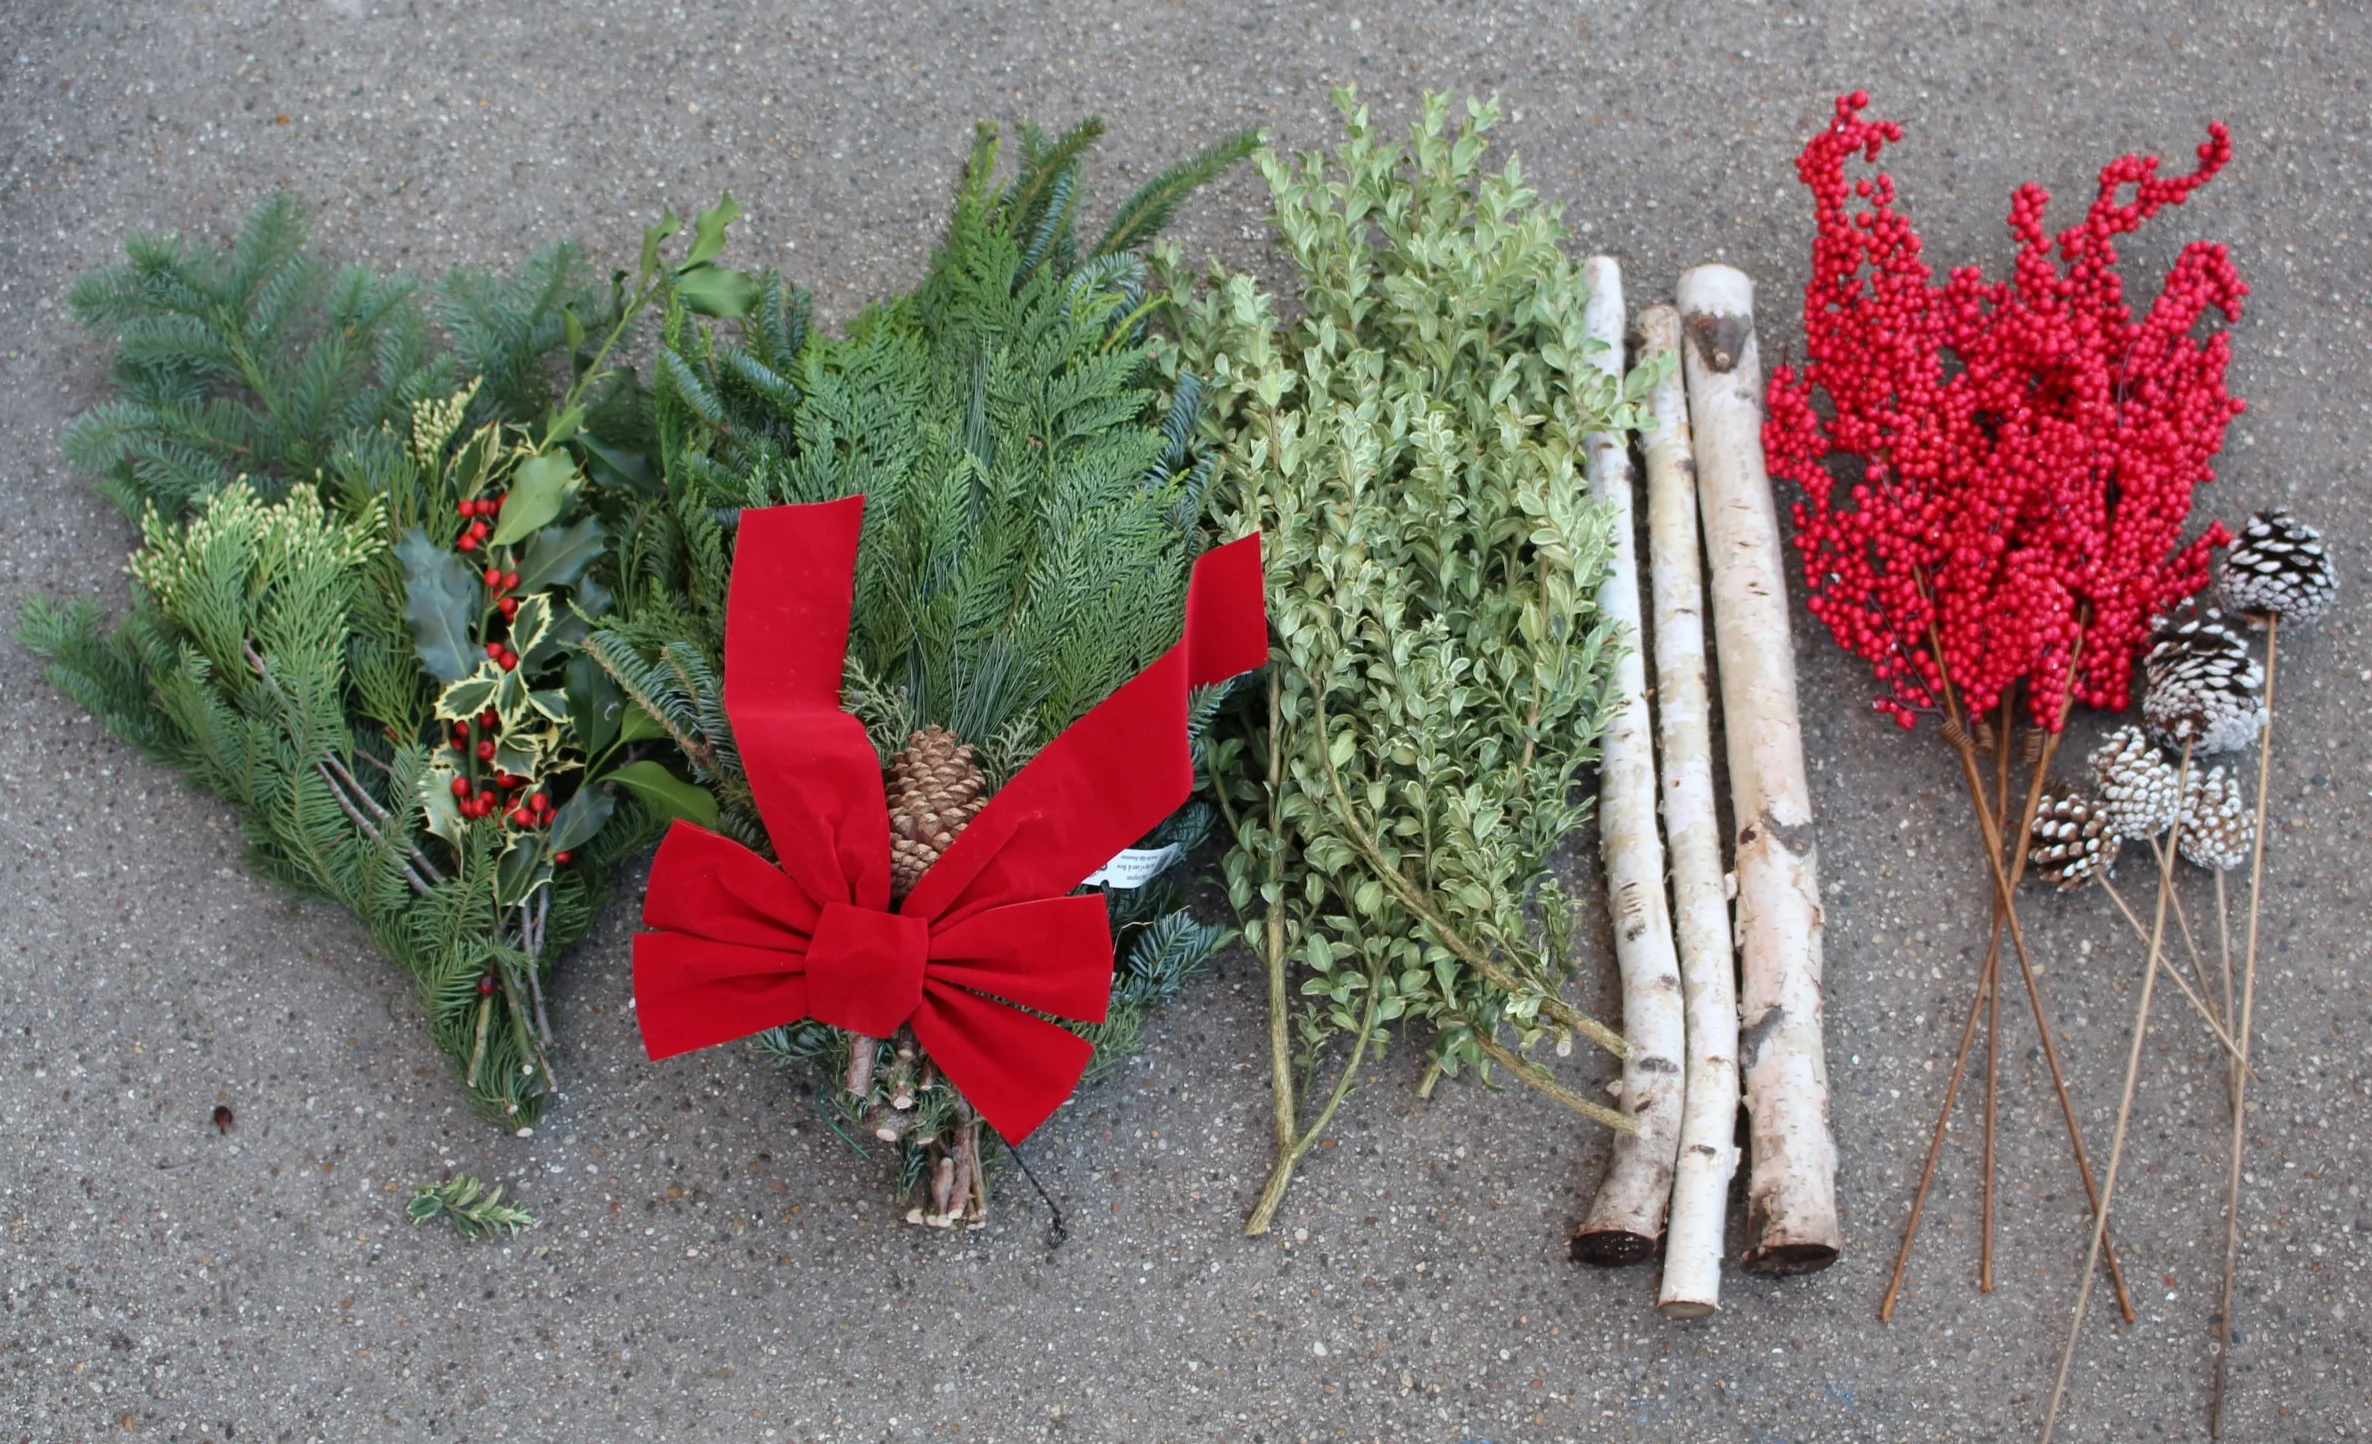
Planter Components from Left to Right: 1 Decorative Holiday Bough (Trader Joe's), 2 Bunches Holiday Swag (Trader Joe's), 1 Bunch Boxwood (Gesthemane Garden Center), 3 Birch Logs (Gesthemane Garden Center), 3 Bunches Red Berries on Sticks (Gesthemane Garden Center), 5 Sprayed Pinecones on Sticks and in various sizes (Gesthemane Garden Center)


Planter Size
First things first, it's important to note that the planters I use are about 12 inches wide in diameter (at their widest point) and nine inches deep. They also had about 2-3 inches of soil in them that helps when placing the elements in the planters.
Step One
The first pieces to go into the planters are the 2 bunches of holiday swag from Trader Joe's. These are pre-wired as you would typically hang something like this and it really helps to give the planters a sturdy base and shape. Don't forget to remove the red bow and pinecones before placing the swag into the planter!
Step Two
Once the holiday swag is firmly placed in the soil I add the three birch logs to the arrangement. You can always play around with their placement once you have added everything to the planters.
Step Three
Next I separate the decorative bough from Trader Joe's and place each item separately. The boughs typically include some holly, evergreen and berries and I like to add them piece by piece to provide some color variation and texture.
Step Four
The last fresh greens to be added are the Variegated English Boxwood that I buy from our local Garden Center. This comes in a bough or bunch and I separate and place the stems individually. This also helps to to add more color to the planters and more stability.
Step Five
Next come the berries. I tend to prefer having a mostly fresh planter but this year opted for faux berries from Gesthemane as our neighborhood squirrel population tends to like to eat the fresh ones. I bought 3 sets of berries and placed them randomly in the planter breaking up the monotony of the green with the bright red.
Step Six
The final addition to the planters is the pine cones. I also place these randomly throughout the greens to break up the colors and texture as well as to fill in any gaps.
et Voilà!
In about six steps the planter is complete and you are on your way to a festive home for the holidays! Truly, these planters will last throughout the holiday season with little to no up-keep. No watering is needed but if you receive a heavy snowfall I will reposition some of the planter elements as they tend to shift due to the weight of the snow. Happy Decorating!